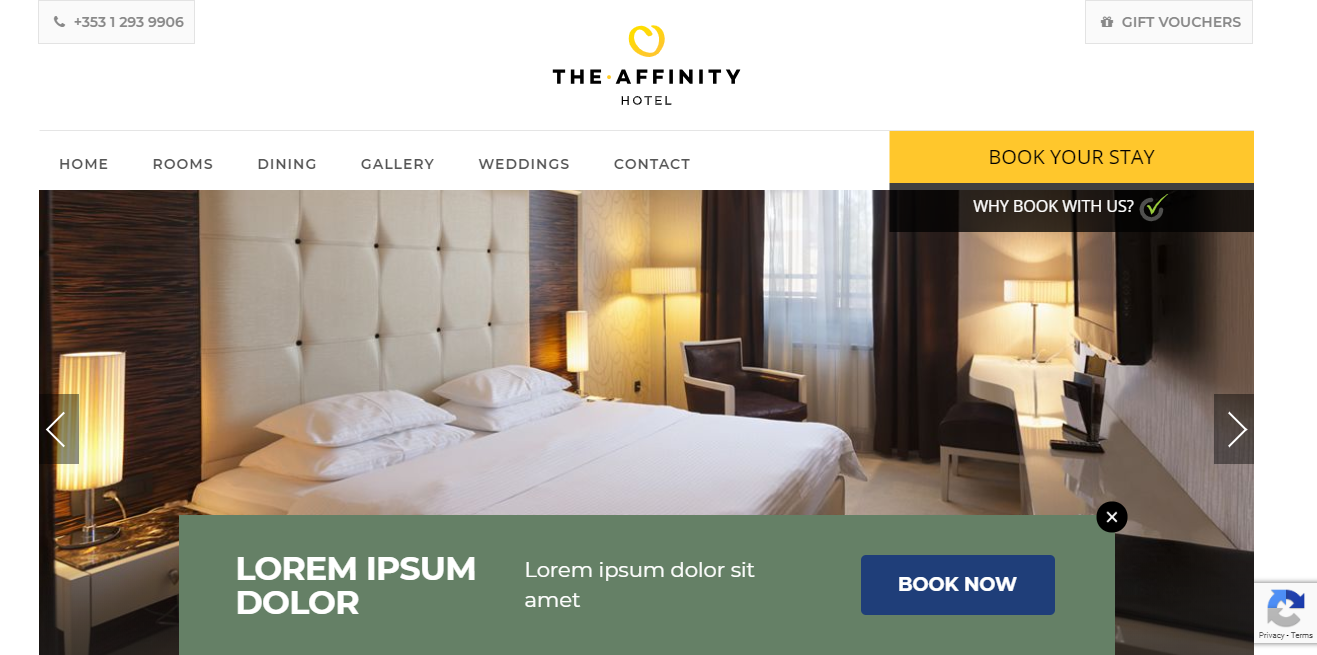
Standard:
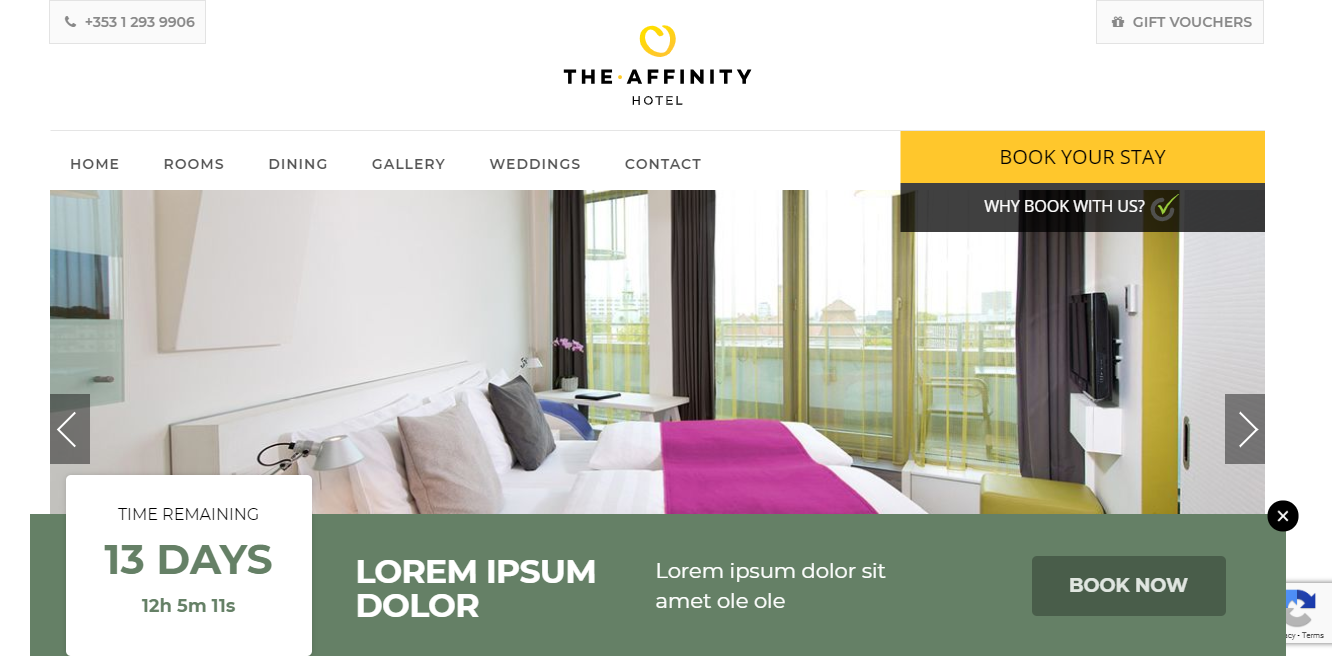
Timer:
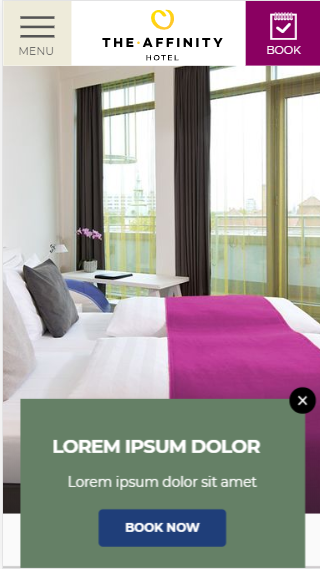
Mobile:
Select Colours
- Use https://coolors.co to pick a colour that is complementary but contrasting to your brand colours. Select the Hex Code Colour for your selected colour e.g. #FF0000
- If you don’t have the codes for your brand colours, you can use a tool like Colourzilla (Chrome) to give you the codes from your website.
Edit in CMS
Under the Data Sets Module, select the PREMIUM ACTION BAR Data Set. 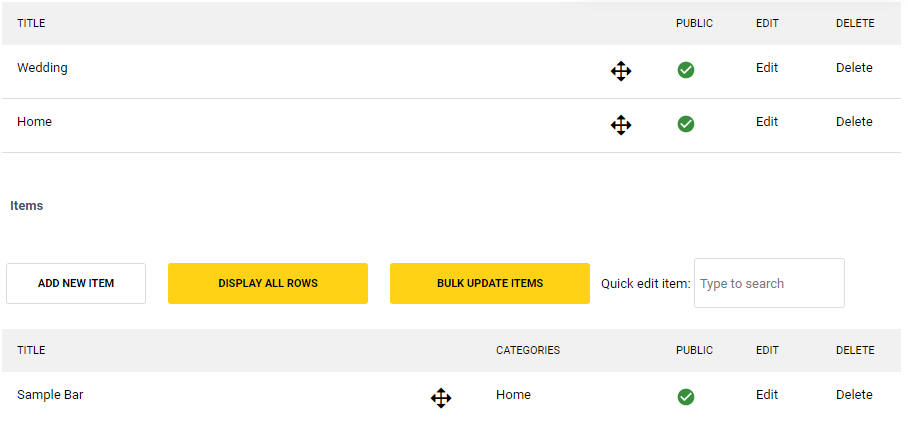
- CATEGORIES – this is how you will manage which Action Bar appears on which page on your site. In the example above, we have Wedding and Home. On the Page set up, you will select the relevant category to show the relevant Action Bar (see below)
- ITEMS – this is for the Action Bar Content – select the Action Bar you want to Edit or ADD NEW ITEM to create a new Action Bar.
- Public - this lets you know if the Action Bar is pubic or not. You can click on this to amend it.
- Title – Name of Rateplan – Internal only, doesn’t show on front end, keep detailed to refer back to it easily
- URL – you can leave this blank, it will self-populate when saved from the Title
- Meta Title, Meta Description, Canonical Tag & Meta Keywords – this is not required for the Action Bar
- Category – Select depending on which page you would like the Action Bar to show.
- Heading – Main Title on the Action Bar e.g. Lorem Ipsum Dolor above
- Description – bottom line of text
- Background Colour – colour for background, as chosen above
- Button Text – text on Call to Action
- Text Colour – colour for text in main section of Action Bar – can be changed to work with Background Colour. White: #ffffff, Black #000000
- Button Colour - colour for the background of the button, if you leave this blank, it will pick up a darker shade of the backgrounf colour
- Button Link – link to the offer / relevant page
- Timer - this is where you decide the type of Action Bar - Timer or No Timer
- Position - this is where you decide the position - left, right or bottom. (Note this only effects desktop, mobile will always be at the bottom) Please consider your website design when picking this.
- Expiry Date - this is the date that the timer is counting down to. Once this has expired, it will take down the Action Bar.
- Expiry Time - this is the time that the timer is counting down to.
- Ensure that only 1 ITEM is Public. This option will also allow you to turn off Action Bar when not required.
- On Page that you want to add the Action Bar, go to ADVANCED SETTINGS. Under STANDARD ACTION BAR – select the Action Bar option in first box and required category in the 2nd. Save Changes
- View on Front End & make any required changes to colour, text etc.
- View on Mobile to ensure you’re happy with how it looks here also.
- Email Net Affinity to let them know that new Action Bar is live, to make a note of date to record impact on bookings.