There are 3 steps to add a gallery or banner to your website:-
- Create the Gallery/Banner
- Upload the image(s) to the Gallery/Banner
- Add Gallery/Banner to page
1) Create the Gallery/Banner
- Go to Modules > Galleries
- Select Create Gallery
- Fill out the required information:-
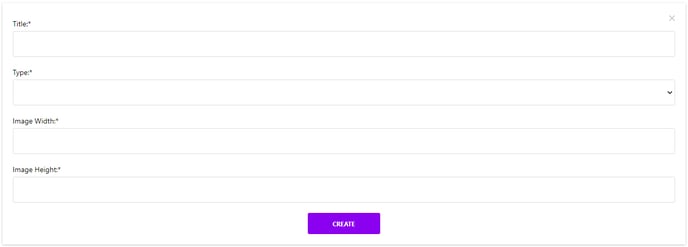
- Title: Title for gallery for internal use only
- Type:
- Insidegallery: A gallery that is to be added to inside pages
- Banner: Homepage or inside page banner
- Gallerypage: For the main gallery page
- Image Width & Height: Correct dimensions are to be added depending on type
Note: If the dimensions are incorrect, the image will not display correctly on the front end. Dimensions vary for each CMS. - Create
2) Upload the image(s) to the Gallery/Banner
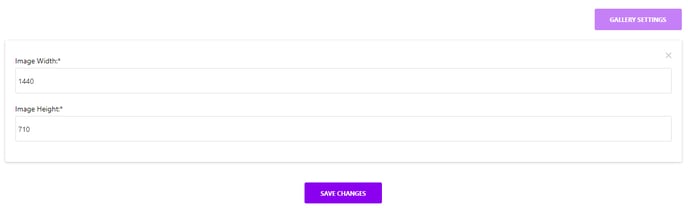
- Edit your gallery/banner of choice
- Ensure your image is the correct dimensions and has been compressed. There are many free online tools to assist with resizing & compressing images.
- To double check the dimensions required for the image, select Gallery Settings
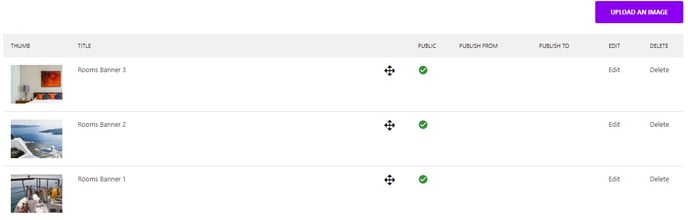
- Select Upload an Image and choose your image to upload
- The uploaded image will appear under Images.
- Choose what images to display or not by marking them public (green tick) or not public (red X)
3) Add Gallery/Banner to page
- Select the required page and go to Advanced Settings
- Choose the gallery type from the dropdown menu under the item you'd like to add/change (i.e Banner, GalleryPage etc)
- Save Changes