The Google Platform requires an active billing account with up-to-date payment details to display an interactive map on your website.
If your map has stopped working, please check your billing account on the platform for troubleshooting.
- Log into your Google Cloud Platform via http://console.cloud.google.com/
- Navigate to Billing via the main menu
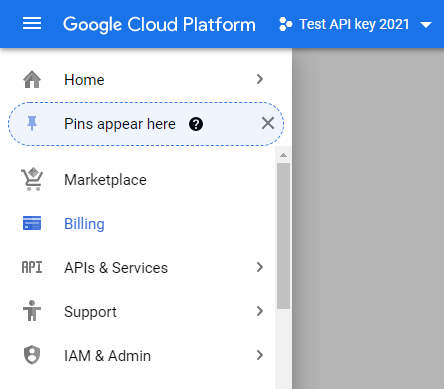
One of two scenarios will occur:
SCENARIO ONE
You may be prompted with a message that your project does not have a linked billing account.
- Click on “Manage Billing Accounts” to view your existing Billing Accounts
- An overview shows you your Billing Accounts with their status and your Projects
-
To add a new Billing Account click on “Add New Billing Account”
-
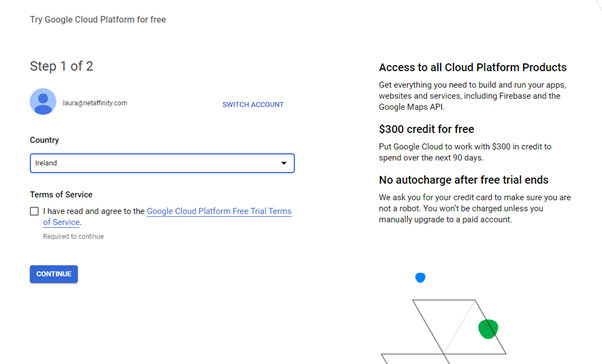
Confirm your country and accept the Terms & Conditions
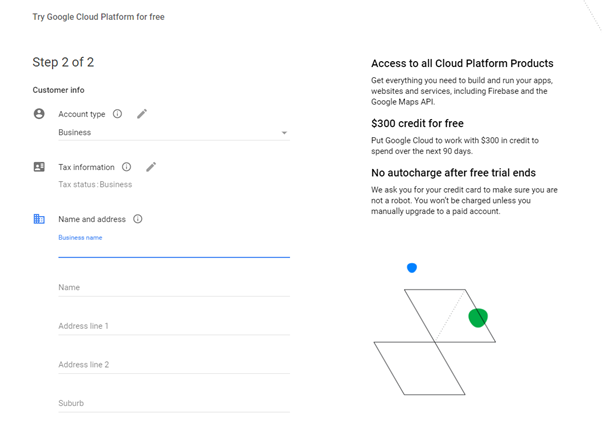
- Add your businesses address information and add a credit card:
- Confirm the message at the bottom to start your free trial (if you haven’t used this before).
SCENARIO TWO
If you are not prompted with an error message that the billing account is not linked, you will land on the overview page. Click on the name of your billing account on the top

- Click on Manage billing accounts

- The view automatically filters by status: active, so if your billing account has expired you won’t see anything listed

- Untick the filter for your billing account to appear

- Click on Create Account to create a new billing account
- Name your new Billing Account. Ideally you should use a distinctive name ,e.g. New Billing Account and the Date of creation. Review all details about your business and it’s address. These details will pull from your old billing account
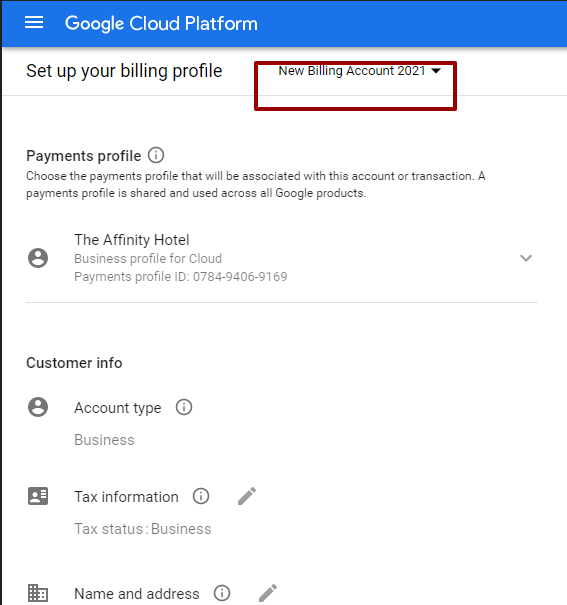
- At the bottom of the page, update your credit card information (if your card has expired). You can expand the payment method section via the arrow
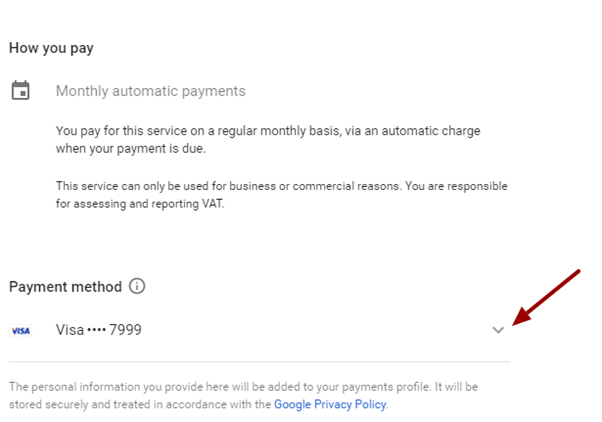
- Add your new credit card
- Submit and Enable Billing
Once you have your new billing account created either via scenario 1 or 2, you will land on the billing overview page again. Return to manage your billing accounts
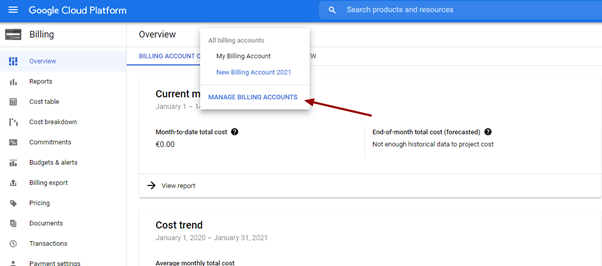
Your new account won’t be linked to any project. You will need to link it to your existing API key project

- Click into the “My Projects” tab

- Click on “Actions” beside your project name
- Click on “Change Billing” and update to your new billing account
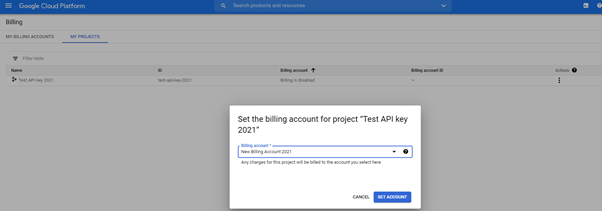
- Click “Set Account” to confirm
- Review your map on your website, should this issue not have fixed your map, reach out to Net Affinity for further troubleshooting guidance.