To avail of all the premium features of CookieBot, including customisation of the consent banner, expansion of the consent expiration, and subscription to automated website scans, we recommend that you purchase a Premium Subscription for CookieBot.
Set Up
- Go to https://admin.cookiebot.com/ and sign up for an account.
- Once you’re logged in to the platform, you can type your main URL to add your website to CookieBot.

- Scroll down and select GDPR as the predefined legislation preset. After this selection, you can scroll back up and click "Next".

- With this selection, your banner settings will be updated in a GDPR-compliant way by default. Therefore, you can skip the next step(s), proceed to the final page, and click "Finish".

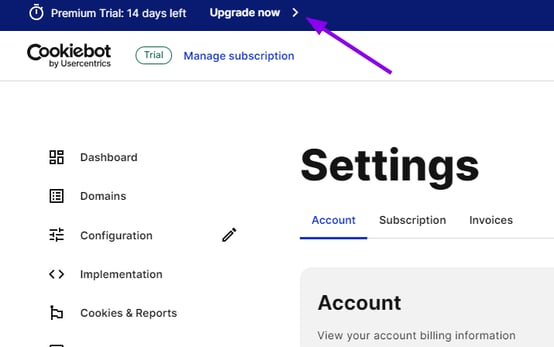
- Now that you’ve completed the initial setup, please note that we recommend upgrading to Premium Subscription by clicking on "Upgrade Now" on the top bar and completing the process.

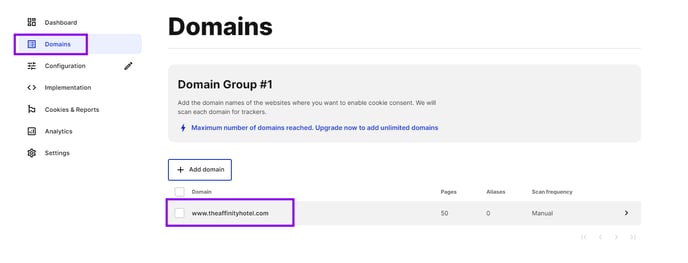
- After this, Go to Domains. Here, a domain group for your domain with your main URL will be automatically created by Cookiebot:

- If you have more than one subdomain across your system, you must add all the URLs (e.g. www.myhotel.com and bookings.myhotel.com) into the same domain group. To do this, follow the insructions in the "Multiple Domains" section below.
- This doesn't apply to the multiple hotels in a group (e.g. www.hotelA.com and www.hotelB.com). Each hotel needs to have a seperate Domain Group. Alternatively, you can create a separete Cookiebot Account for each hotel.
- If all your systems (website, booking engine and voucher engine etc.) are under the same subdomain (e.g. www.myhotel.com) and there are no additional domains or subdomains, you can skip the “Multiple Domains” section below.
Multiple Domains
Make sure all the URLs you have entered do not include the https:// part.
- To start adding your domains, click on the "+ Add Domain" button:

- Ensure all your domains and subdomains (www.myhotel.com and bookings.myhotel.com) you would like to track are listed. Please get in touch with your account manager if you are not sure which subdomains are in use.

- Now, you must enable the cross-domain consent-sharing feature. This will allow all your subdomains to be linked and users will only be asked once for their cookie consent when navigating between the subdomains on the same level, only if the domains share the same top-level domain. This means that consent submitted on a subdomain can be shared with other sub-domains and the top-level domain, but not the other way around.
- To activate the cross-domain consent-sharing feature, click on the "Manage your domain groups" option and then click on the arrow icon of the Domain Group that you’d like to configure. Scroll down and check the “Enable cross-domain sharing for all domains” option then save the changes.

Configuration
- Navigate to the Configurations tab. Since you have chosen the GDPR preset option while setting up your Cookiebot account, Cookiebot should’ve handled most of the changes below automatically for you. If you haven’t selected the GDPR preset option, you can follow the steps below to ensure everything is applied correctly.
- Select a banner layout, keeping in mind any potential interference with action bars or search boxes. We recommend the "Dialog" layout.

- Move to the “Compliance” section and select your method of consent. Please choose "Explicit Consent". The available options are Implied Consent and Explicit Consent.

- Select the Type as "Inline Multilevel" to allow users to opt in to and out of different types of cookies.

- For the buttons, choose "Reject all / Selection / Allow All"

- You can use default preselected checkboxes on your banner as long as the buttons chosen are "Reject all / Selection / Allow All" buttons. For this, click "Show additional settings" and mark all the cookie categories.

- The banner should be displayed to all visitors regardless of their location, for this, ensure "All visitors" is the selected option under the Distribution section:

- Navigate to the Content tab and carefully review all explanations to ensure they accurately represent the types of cookies you are using on your site and the marketing channels you are using.
-
- If you are running remarketing or behavioral targeting on any platforms, the message on your cookie banner must inform of that. This information cannot be hidden. Here is a sample cookie message which has been approved by Google:
We use cookies to personalise content and ads, to provide social media features, and to analyse our traffic. We also share information about your use of our site with our social media, advertising and analytics partners who may combine it with other information that you’ve provided to them or that they’ve collected from your use of their services. - You can change the "Text in [Allow All] button" to "Yes, I Agree".

- If you are running remarketing or behavioral targeting on any platforms, the message on your cookie banner must inform of that. This information cannot be hidden. Here is a sample cookie message which has been approved by Google:
-
- Once you are content with the banner configurations you’ve made for your domain group, don’t forget to save changes.

- Navigate to the Implementation tab and provide your account manager at Net Affinity with the two scripts to be added to your page. One will be from the “CMP Banner” tab and the other one will be from the “Cookie Declaration” tab.

Implementation
- For details on implementation please visit Cookiebot's knowledge base

