Note: this is for older Marketing Landing Page Layouts, built prior to 2022. Follow these links if you're looking to update your Dynamic Marketing Landing Page or Website Builder Marketing Landing Page
STEP 1: How to add new Landing Page and create main content
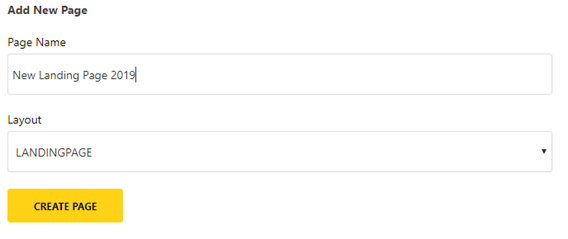
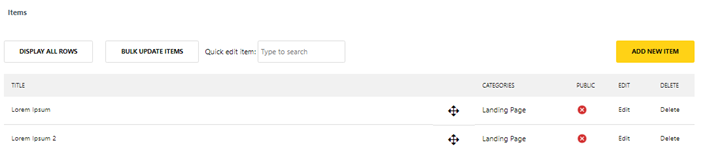
1. To create a new Landing Page, click on 'New Page' in the CMS homepage
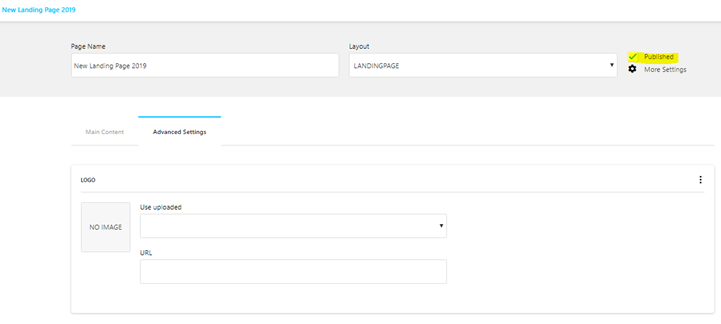
2. Name the landing page and create a link to it and pick the LANDINGPAGE layout
3. Once the new landing page is added, click on it to add and edit the main content in Advanced Settings
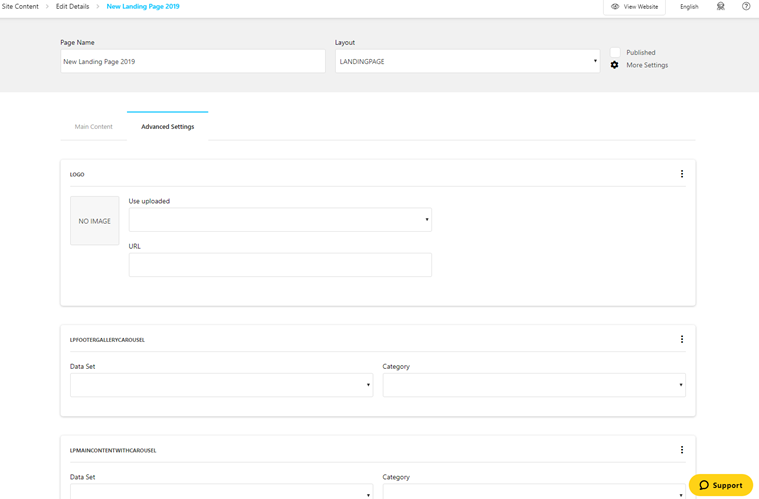
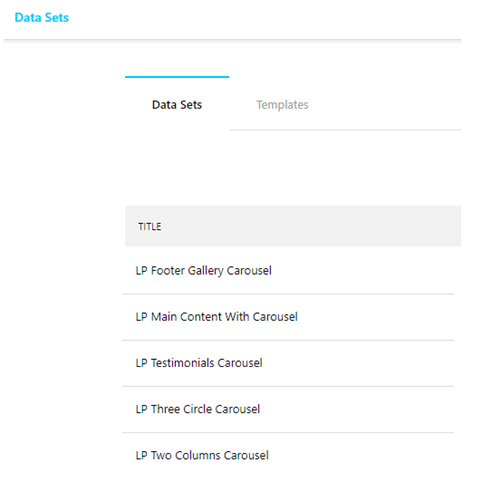
4. All content items are created in Modules > Data Sets – you should create all the content items there first and then add them to the landing page at the end
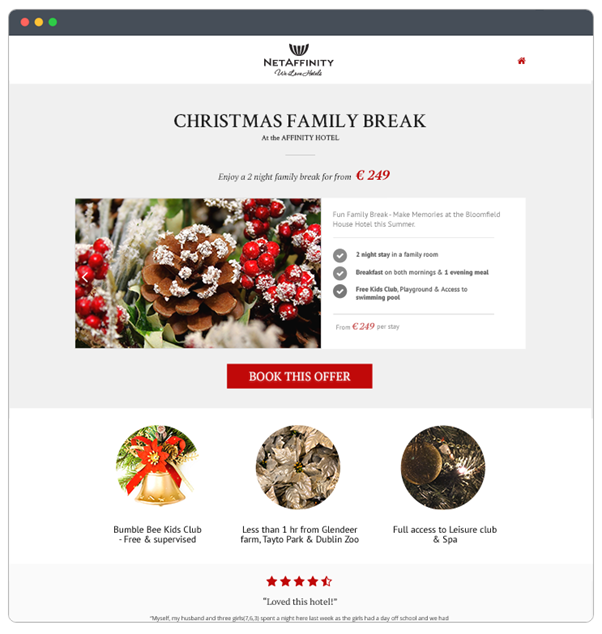
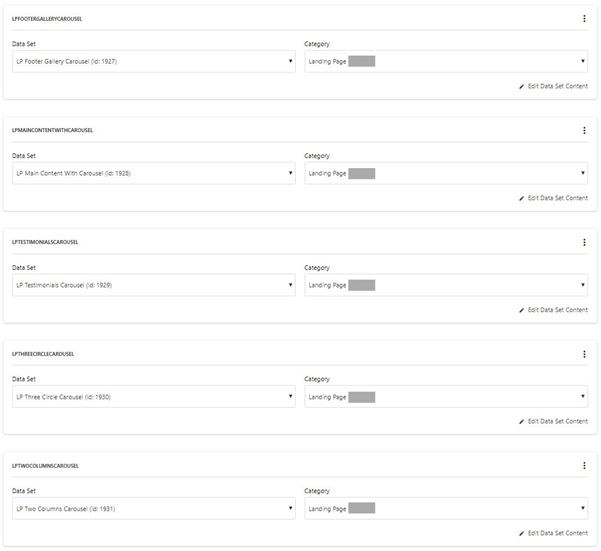
FOOTER GALLERY CAROUSEL: this is a static image in the footer
- Add a Category that’s relevant to your landing page – this Category can be used for all content items, for example “Christmas 2019”
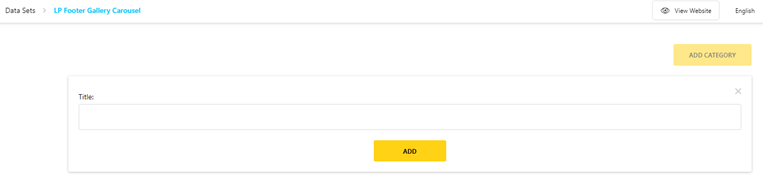
- Add new by clicking “+ Add New Item” – fill in all details and tick the landing page category you want this item to belong to (for example “Christmas 2019”)
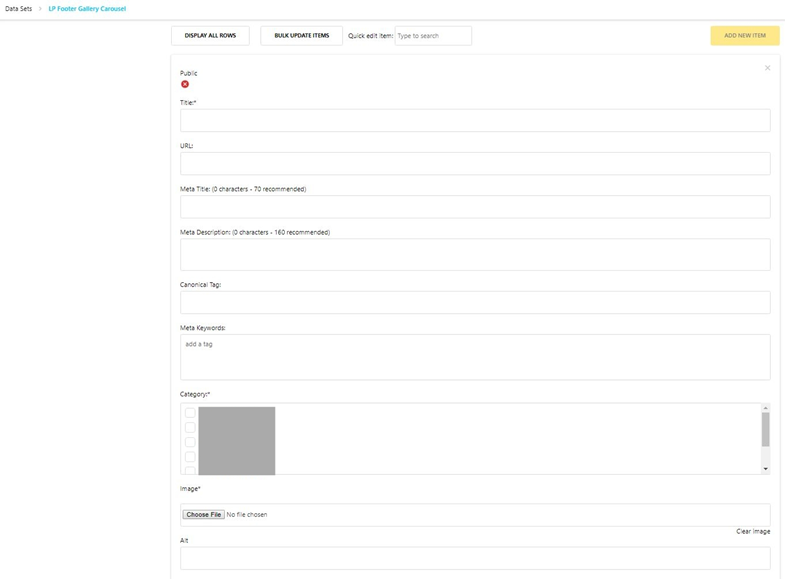
Make sure to it is made public, i.e. the green tick is on not the red cross

- Image size: 1600x800
- Make sure the image is compressed to a minimum size
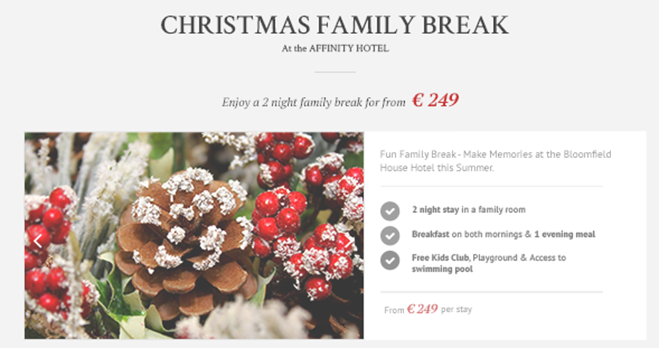
MAIN CONTENT WITH CAROUSEL
- Add a Category that’s relevant to your landing page – this Category can be used for all content items, for example “Christmas 2019”
Add new by clicking “+ Add New Item” – fill in all details and tick the landing page category you want this item to belong to (for example “Christmas 2019”)
Title: this is just internal name of the landing page on CMS and doesn’t appear on the live page
Category: pick the category this landing page relates to (for example “Christmas 2019”)
Heading: This is the main heading that appears on the landing page
Sub-heading: the line below the heading
Description: Short description in the main box
List items: each of the bullet points that appear
Before Price: text that appears before the price, e.g. “from” or “only”
Price: text in pink, could be price (€300) or percentage (15%)
After Price: text that appear after text, e.g. “total stay” or “off”
Images: add up to 3 for a carousel affect: size of each is 1600x800
3 CIRCLE CAROUSEL: Optional
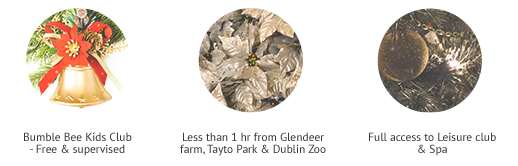
- Add a Category that’s relevant to your landing page – this Category can be used for all content items, for example “Christmas 2019”
- Add new by clicking “+ Add New Item” – fill in all details (please note that the text shouldn’t be longer than 2 lines) and tick the landing page category you want this item to belong to (for example “Christmas 2019”)
- You can add as many reviews/testimonials as you wish however please note that each one needs to be added separately
- Image size: 800x800
TESTIMONIAL CAROUSEL: Optional
- Add a Category that’s relevant to your landing page – this Category can be used for all content items, for example “Christmas 2019”
- Add new by clicking “+ Add New Item” – fill in all details and tick the landing page category you want this item to belong to (for example “Christmas 2019”)
- You can add as many reviews/testimonials as you wish however please note that each one needs to be added separately

2 COLUMNS CAROUSEL: Optional
- Add a Category that’s relevant to your landing page – this Category can be used for all content items, for example “Christmas 2019”
- Add new by clicking “+ Add New Item” – fill in all details (please note that the text shouldn’t be longer than 2 lines) and tick the landing page category you want this item to belong to (for example “Christmas 2019”)
- This is very useful for any additional package information: e.g. for family offers, it could be used to list nearby activities, available dates, T&Cs, etc.
- Image size: 1600x800
STEP 2: Putting it all together
- Go back to “Pages” and click on the new landing page you created
- Switch tabs from “Main Content” to “Advanced Settings”
- Check the “Published” box at the top, fill in all required text field and select the data sets in each category you just created
- Add CTA Button: this is the call to action button, e.g. Book Now, Enquire Today, Call us, etc.
- Add Footer Phrase: this is the line at the very bottom of the landing page
- Main HEX Colour is non-customisable and is set by default – please leave this blank
- Add the CTA Link: you can either pick one from a list of all available CMS pages or add an external link, for example booking engine url to a specific package you want viewers to book
- Save all changes and view the landing page on the front end: always make sure you’re happy with the end result and if not, you can make the necessary edits before circulating the landing page link